Setting up Shifts
To manage Shifts, use the command Setup > Shifts.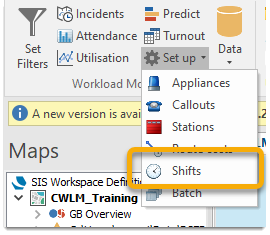
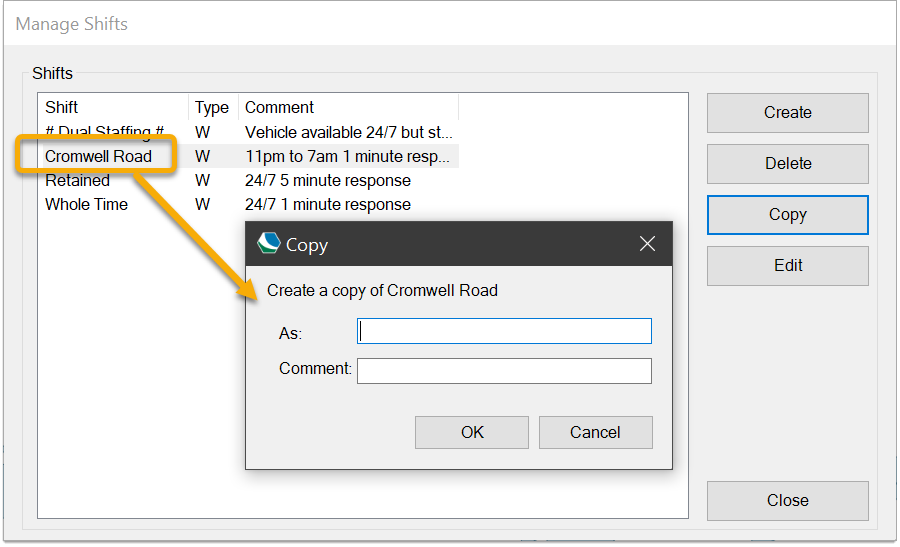
This opens the Manage Shifts dialog which lists the tables of shifts already created.
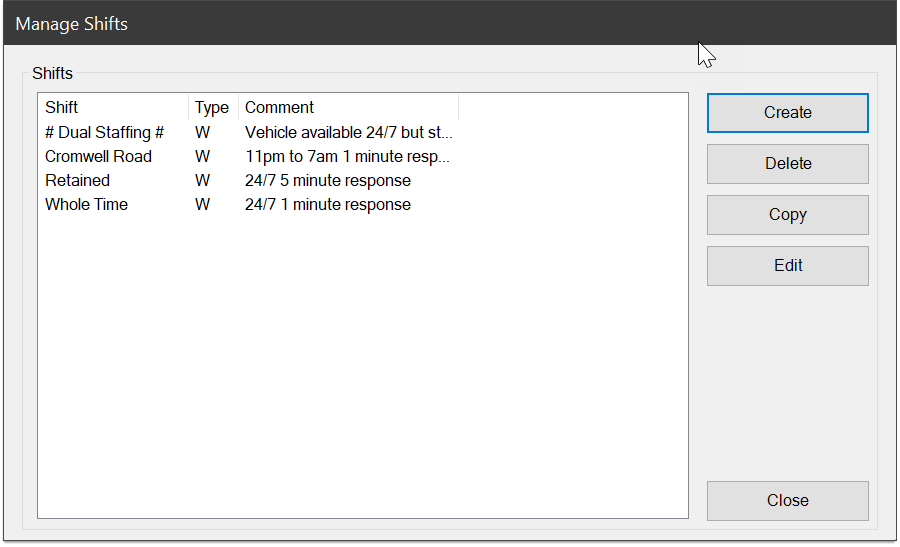
Remember a shift determines the appliance's availability, NOT the availability of personnel crewing the appliance.
1. Create Shift
To create a new shift click  to display the Create a Shift dialog. You can either create a Rolling Shift or a Weekly Shift.
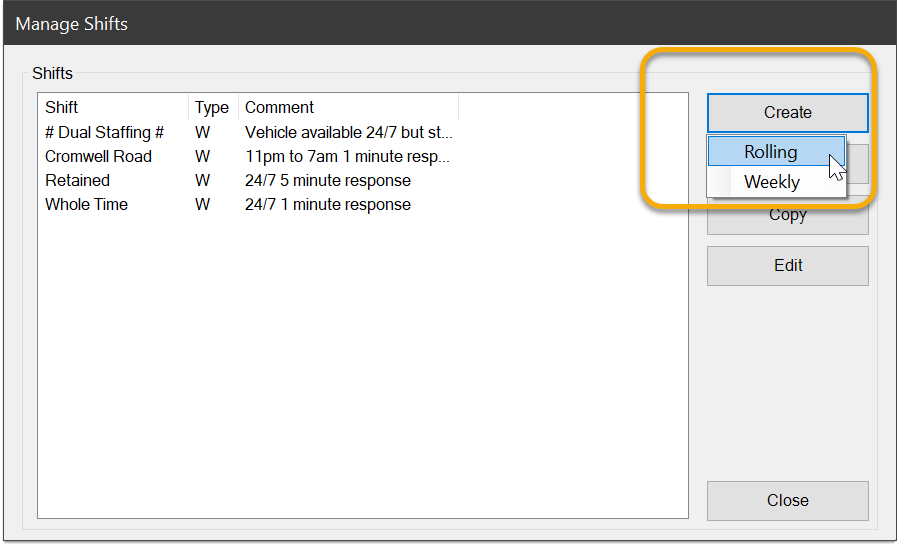
Rolling Shift
A Rolling shift is similar to a Weekly shift except it:
- can be based on any number of days which continually roll over
- has days that are numbered 1 – N rather than named after weekdays.
- has a start date for day 1
Note: An appliance assigned a rolling shift will not be mobilised before the day 1 date.
Weekly Shift
- Set the required shift start/end times and the reaction times in minutes.
- %Avail (default value = 100) defines the likelihood of the appliance being available during the specified period.
For example the Whole-time crew are 100% available (i.e. always respond to a callout request) whereas the Retained crew are 90% (i.e. their availability is not guaranteed – there is only a 90% chance of them being available.)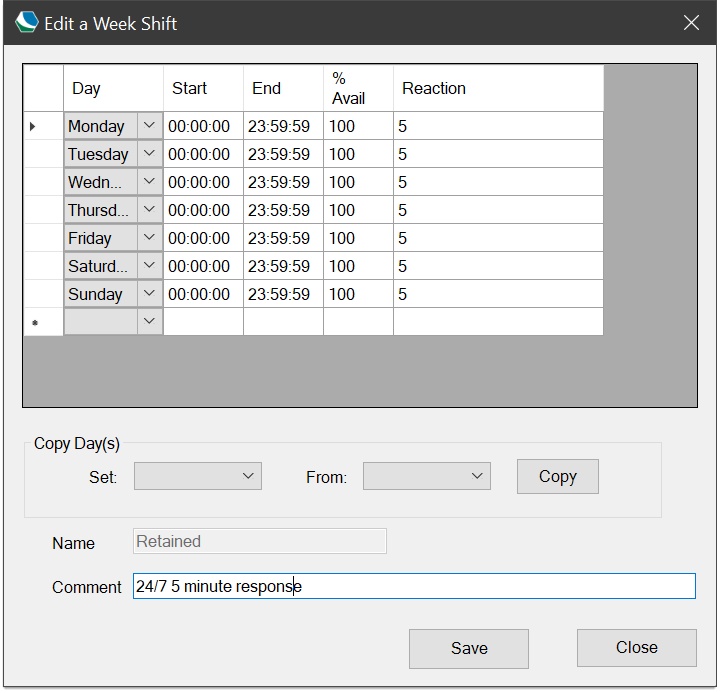
- Use the Copy button to copy settings for one day to other days.
- Enter the name of the shift and any required comment and click Create.
- If you click on Close the dialog will close with no entries being saved.
The Manage Shifts dialog will now show the new shift.
2. Delete a Shift
To delete a shift select the shift to be deleted and click the  Delete.
3. Copy a Shift
To copy a shift (normally to form the base shift for editing) select the shift and click  .
.
4. Edit a Shift
To edit a shift select the shift in and click  .
.
The Edit a Shift dialog will be displayed:
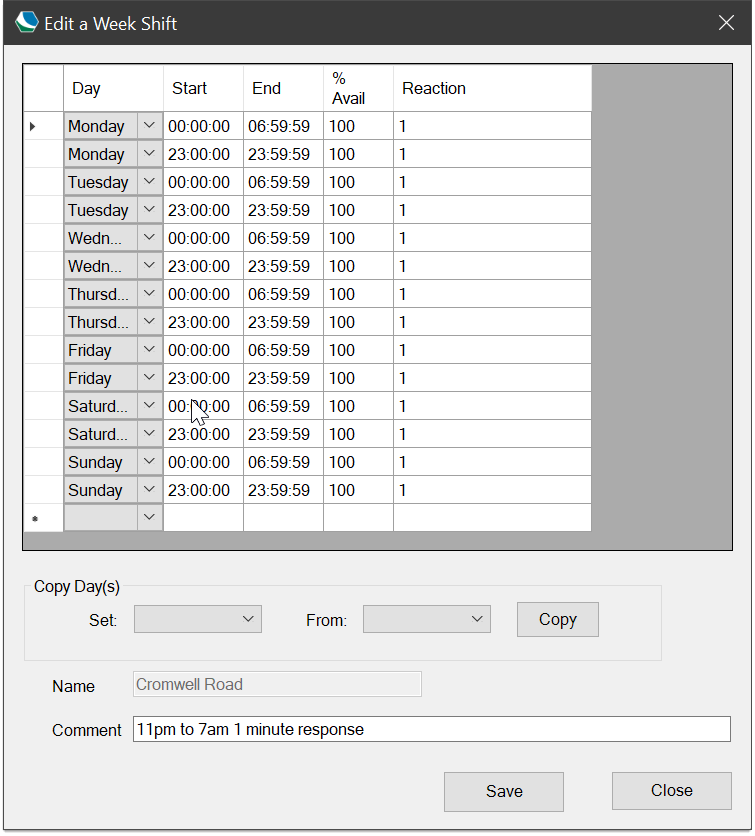
Make all necessary changes and click Save.
If you click on Close the dialog will close with no edits being saved.
To delete a row from the set during this creation:
- Select the row by clicking on it (the black triangle symbol to the left shows which row is ‘current’);
- Hit the Delete key on the keyboard.